Live Tracking with Strava
Automatically import the GPS route from your Strava activities on TravelMap (requires having a Premium Plus account). Compatible with free Strava accounts.
Presentation: travelmap.net/live-tracking1. Connect your Strava account
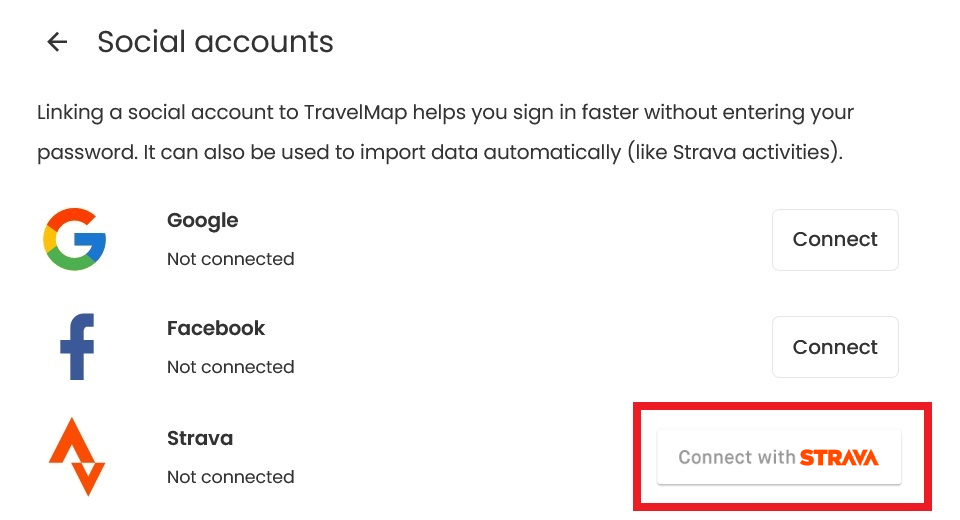
- Open your TravelMap administration
- Go to: Settings > My account > Social accounts
- Strava: click on the button Connect with Strava
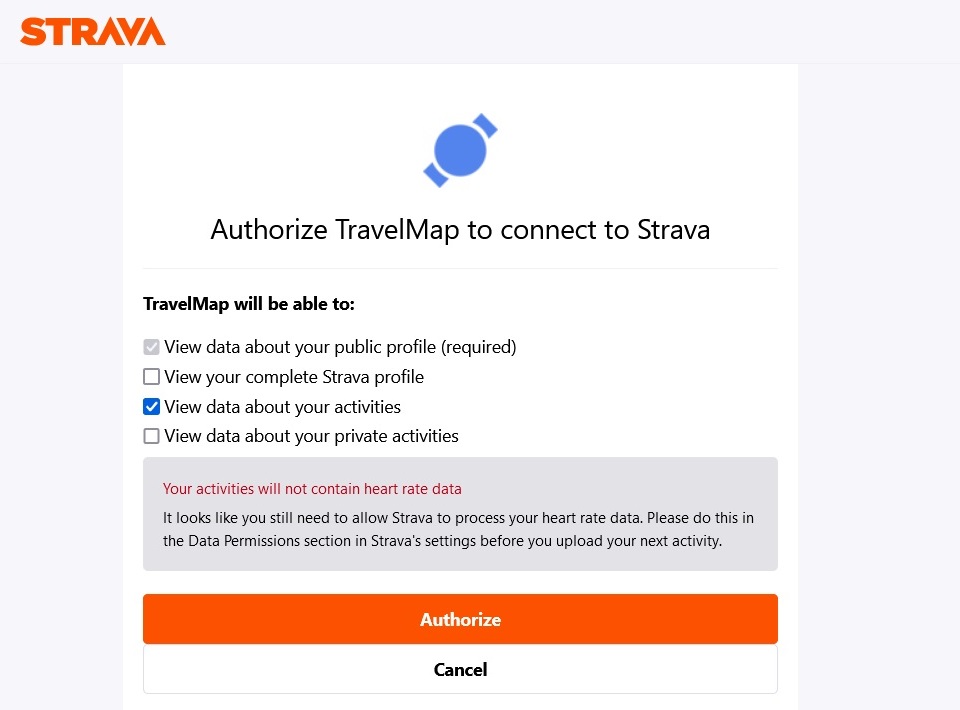
2. Authorize TravelMap to access your Strava activities
- Once you've been redirected, login to your Strava account
- Check the box "View data about your activities"
- Click on "Authorize"
- You should see a success message "Strava account connected"
3. Create a new Live Tracking
- Go to: Settings > Live Tracking > New
- GPS tracking device: select "Strava"
- Select the map you want to update
- Click on "Create"
That's it! Now whenever you save a new activity on Strava, its route will be imported on TravelMap automatically.
You can use the Live Tracking settings to pause the synchronization or choose another map.
Note: you can also choose to import the GPS routes of your Strava activities manually from your admin map (click on the settings icon, "Import GPS track", "Import a Strava activity").